


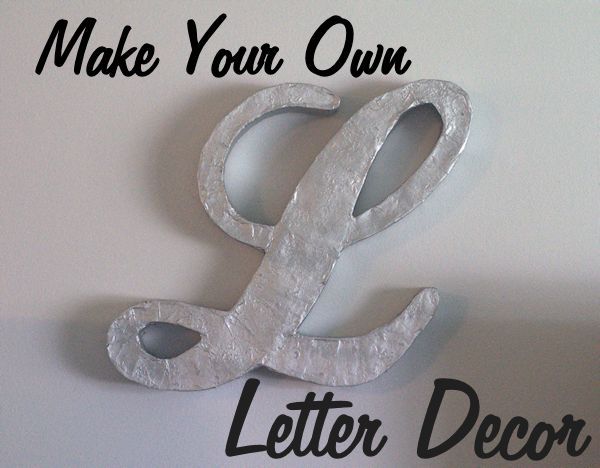

The inspiration for this project comes from this post that I came across on Pinterest. I knew I wanted a big L for my living room wall and buying one was out of the question. For the size I wanted, it was just too much.
I was really excited when I came across this project because the only supplies I actually had to buy were tape & spray paint.
Before we get started, you should know that this project is quite messy and might require some planning. You have to allow time for the paper mâché to dry, so it's not a quick craft.
Supplies:
Empty cereal or other thin cardboard boxes (you'll need quite a few)
Empty toilet paper or paper towel rolls
Tape
Newspaper cut into strips
1+ cup water
1 cup flour
1/2 tbs salt
fine sandpaper
Paint of your choice (I used silver spray paint)
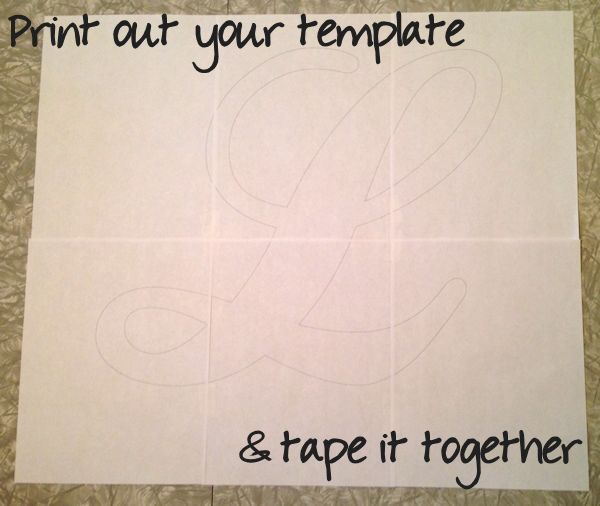
The first thing you need to do, is choose a font that you like for your letter. I wanted an L like Laverne's from Laverne & Shirley. I'm super picky, so that took awhile. I ended up choosing Ballpark from fonts101.com.
The next step is to make your template. I used Microsoft Publisher for this because there is an option for tiled printing. If you need some help learning how to make yours, this link should be helpful. Also, you'll want to print your letter as an outline to avoid wasting all the ink in your printer!
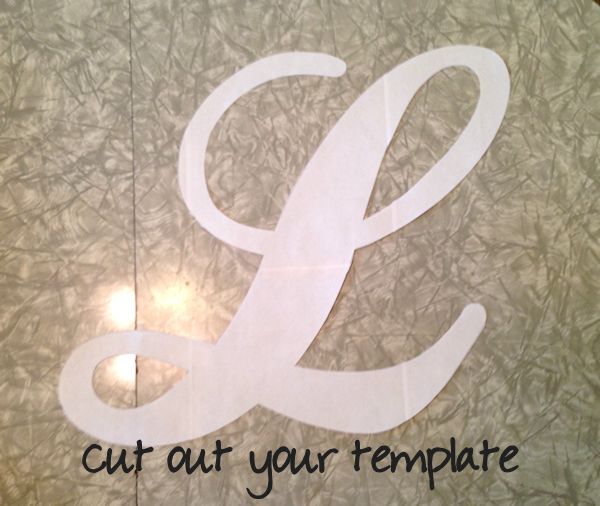
Once I had it printed, I taped it together and then cut it out with an Xacto knife. Next time, I'm going to cut my letter out with scissors and then tape it together. It would've been much easier!
Once I had it printed, I taped it together and then cut it out with an Xacto knife. Next time, I'm going to cut my letter out with scissors and then tape it together. It would've been much easier!
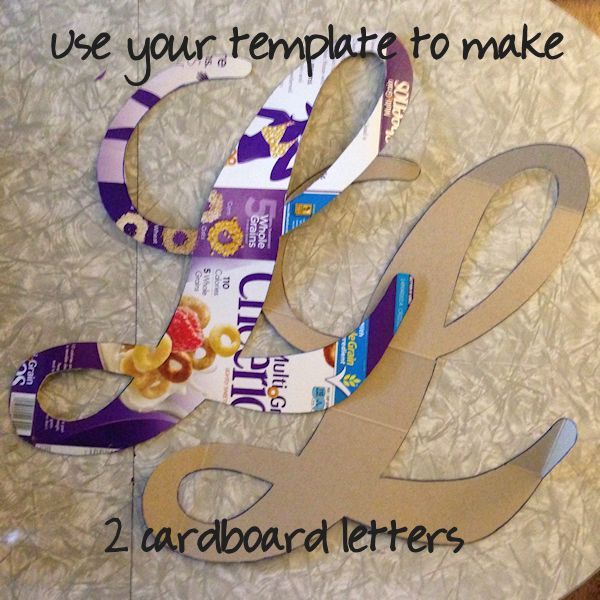
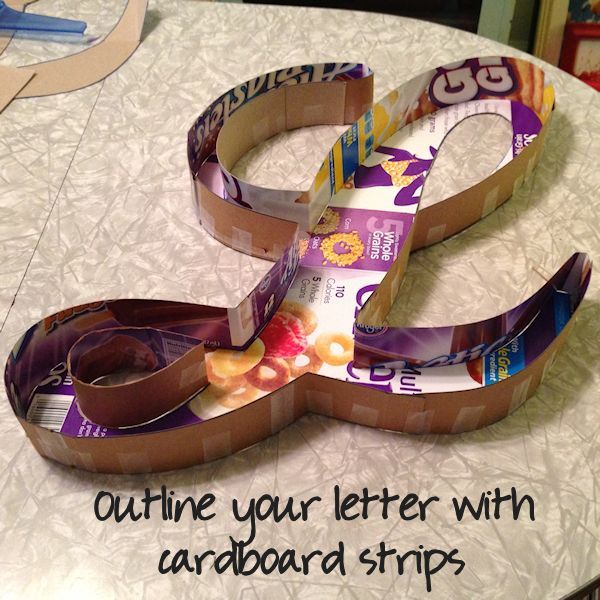
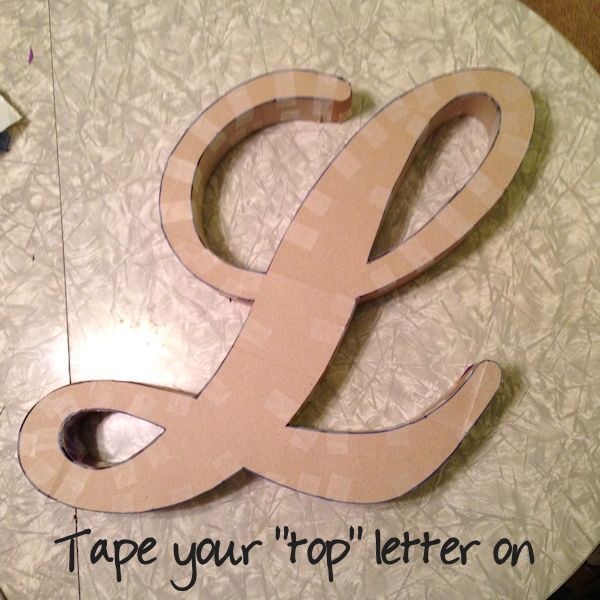
Next, use your template to cut 2 letters out of your cardboard. You need 2 because your letter will need a back & front.
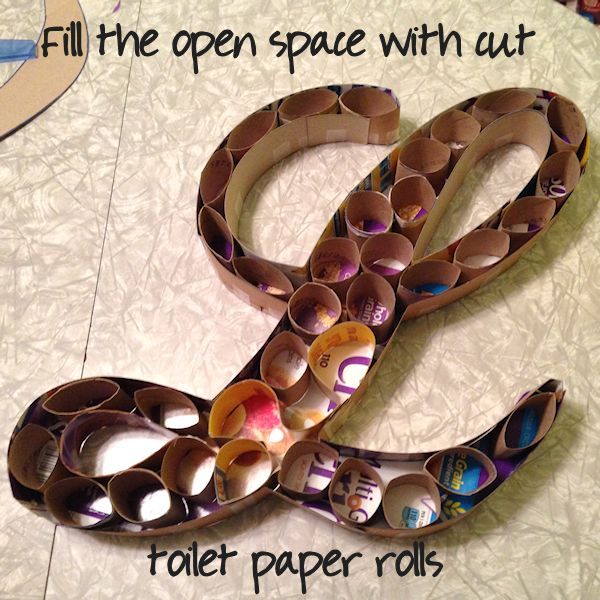
Now you need to decide how thick you want your letter to be. I made mine 2 inches thick, so the next thing I did was to cut 2" wide cereal box strips & I cut the toilet paper and paper towel rolls into 2" sections.
I outlined the base letter with the cardboard strips and tape. Then I filled the empty space with the roll sections.
Now you can tape the other letter on top, so it looks like this:
Next comes the messy part and I have to apologize because I don't have any photos of it. But guys, it was SO messy! There's no way I could have picked up my camera!
To make your paper mâché mix together 1 cup of flour, 1 cup of water, & 1 tbs salt. It's important to get the lumps out. I used a whisk. My mixture was still very thick and I ended up adding more water to keep my newspaper strips from tearing.
If you've never used paper mâché, or even if you could use a refresher, read this. It's fantastic. I will tell you, that I don't use a brush. I did the strips on newspaper in my bowl and use my fingers as a squeegee. (And I wonder why I make such a mess!) Make sure you protect your work area. I laid out an old vinyl tablecloth and was able to shake it off outside when I was done.
Cover your entire letter with paper mâché and allow to dry completely. For me, that was overnight and part of the next day and I kept flipping it. Use fine sandpaper to smooth any bumps or rough areas. Then, do a second layer and allow to dry completely again. (this is the time-consuming part) Sand again, dust off any debris, and you're ready to paint!
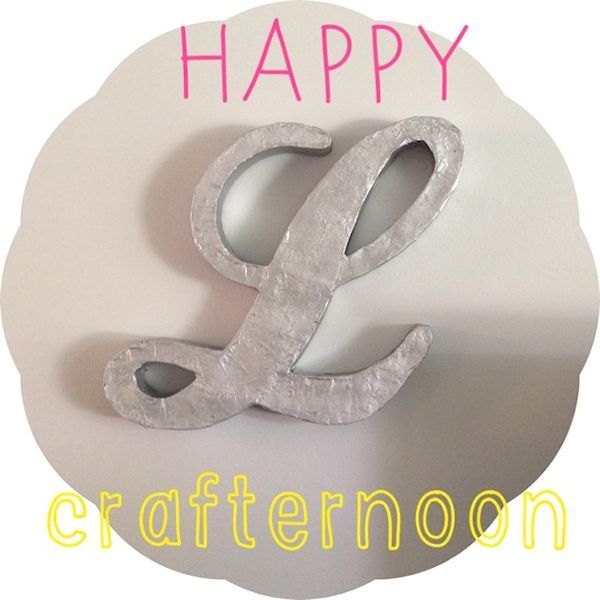
You can choose any paint you like. I think spray painting is the easiest and I wanted to use silver because I wanted my letter to look metallic.
I didn't use any sealer or top coat of any kind since wall decor doesn't take the kind of abuse as furniture. Since my L was so lightweight, I was able to easily hang it with Command Strips.
Here's the finished product. You may have seen this shot on Instagram...

No comments :
Post a Comment
Thanks for stopping by! Please leave a comment. I read each and every one!